
Median Nerve Glides for Shoulder & Hand Health: A Comprehensive Guide
Discover effective techniques for optimizing shoulder and hand wellness through targeted median nerve glides, often found in detailed PDF resources.
These exercises promote nerve mobility, addressing potential compression points and enhancing overall function.
Explore how these glides, involving six distinct positions, can contribute to improved hand health and alleviate discomfort, as detailed in various hand surgery guides.
Understanding the Median Nerve
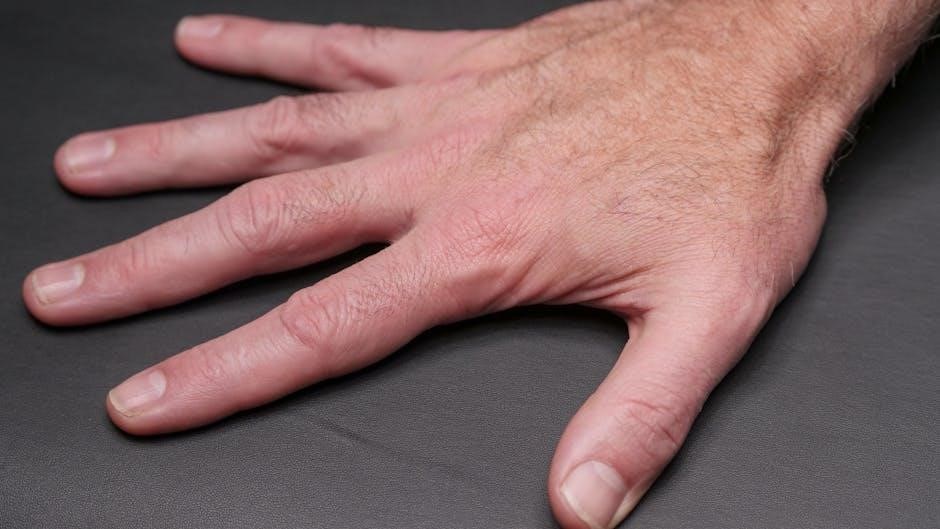
The median nerve is a crucial component of the brachial plexus, originating from nerve roots C6 through T1. It’s a mixed nerve, meaning it carries both motor and sensory information, profoundly impacting hand and finger function. Understanding its role is fundamental when exploring median nerve glides, often detailed in comprehensive shoulder and hand health PDFs.
This nerve is primarily responsible for sensation in the palm, thumb, index, middle, and radial side of the ring finger. Motor functions controlled by the median nerve include thumb opposition, allowing us to grasp objects, and flexion of the wrist and fingers. Its pathway is complex, traversing through various anatomical structures, making it susceptible to compression.
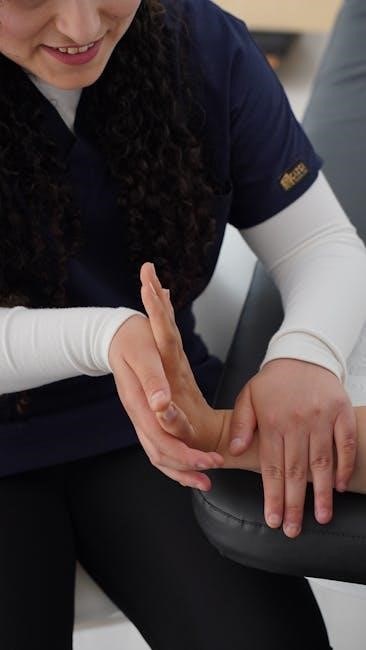
Nerve gliding exercises, like those found in resources from Raleigh Hand Surgery, aim to restore optimal nerve movement within these structures. These exercises aren’t about stretching the nerve itself, but rather facilitating its smooth gliding motion. A healthy median nerve is vital for pain-free hand and wrist movement, and understanding its anatomy is the first step towards effective management, often supported by readily available PDF guides.
Anatomy of the Median Nerve Pathway
The median nerve’s journey begins in the arm, descending through the brachial plexus and traveling down the forearm. It passes beneath the bicipital aponeurosis before entering the carpal tunnel at the wrist – a common site for compression, often addressed with gliding exercises detailed in shoulder and hand health PDFs.
Within the carpal tunnel, the median nerve lies alongside tendons, making it vulnerable to pressure from inflammation or anatomical variations. Before reaching the carpal tunnel, it passes through the pronator teres muscle, another potential compression point. Understanding this pathway is crucial for targeted nerve gliding techniques.
Resources like those from Joseph J. Schreiber, MD, emphasize the importance of addressing the entire nerve pathway, not just the carpal tunnel. Effective gliding exercises, often illustrated in PDF guides, aim to mobilize the nerve throughout its course, from the shoulder to the fingertips. This holistic approach ensures optimal nerve function and minimizes the risk of re-compression along its complex route.
What are Median Nerve Glides?
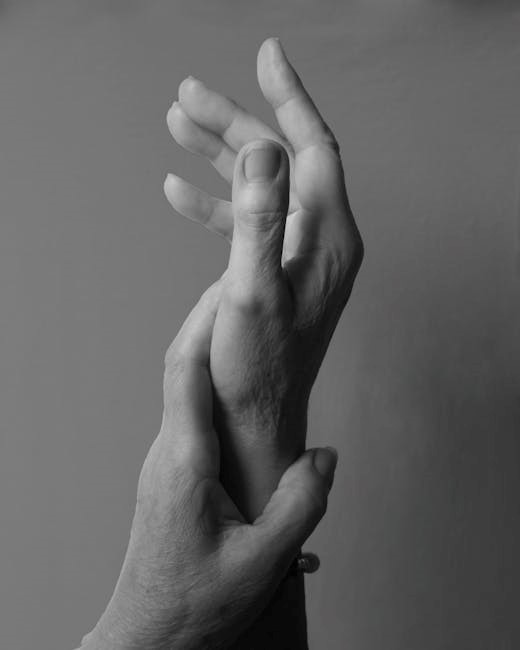
Median nerve glides are gentle, specific movements designed to encourage the median nerve to move smoothly through its pathway – from the shoulder, down the arm, through the wrist, and into the hand. These exercises aren’t stretches; they’re about mobilizing the nerve itself, preventing it from becoming stuck within surrounding tissues. Detailed instructions are frequently found within comprehensive shoulder and hand health PDF guides.
The exercises involve a series of positions, systematically moving the wrist and fingers through flexion and extension. As highlighted in research concerning carpal tunnel syndrome, these glides move the median nerve through six distinct positions, carefully orchestrated to avoid increasing tension.
These gliding techniques, often recommended by hand surgeons like Joseph J. Schreiber, MD, aim to restore optimal nerve function. PDF resources typically outline a sequence, starting with a neutral wrist and progressing through various combinations of wrist and finger movements. The goal is to improve nerve conduction and alleviate symptoms associated with compression.
Why Perform Median Nerve Glides?
Performing median nerve glides offers a proactive approach to maintaining optimal nerve health and function, often detailed in accessible PDF guides. These exercises are particularly beneficial for individuals experiencing symptoms related to nerve compression, such as those associated with carpal tunnel syndrome. They aim to improve the nerve’s ability to move freely, reducing irritation and discomfort.
Specifically, these glides can play a crucial role in addressing carpal tunnel syndrome by reducing swelling and improving nerve conduction. They also offer relief from nerve compression in the shoulder, elbow, or wrist, promoting a healthier nerve environment. Furthermore, consistent practice can lead to improved hand and finger function, enhancing dexterity and grip strength.
PDF resources from sources like Raleigh Hand Surgery emphasize the importance of these exercises as part of a comprehensive treatment plan. By incorporating median nerve glides into a daily routine, individuals can actively participate in their recovery and prevent future complications, fostering long-term hand and shoulder wellness.
Addressing Carpal Tunnel Syndrome
Median nerve glides are frequently recommended as a conservative treatment approach for carpal tunnel syndrome, with detailed instructions often available in downloadable PDF guides. These exercises specifically target the median nerve, which is commonly compressed within the carpal tunnel at the wrist, leading to pain, numbness, and tingling in the hand and fingers.

By gently moving the nerve through its pathway, glides help to reduce inflammation and improve nerve conduction. They aim to restore the nerve’s natural gliding motion, preventing it from becoming stuck or irritated. Resources like those from Joseph J. Schreiber, MD, highlight the value of these exercises in managing symptoms.

While not a cure, consistent performance of median nerve glides, as outlined in PDF resources, can significantly alleviate discomfort and improve hand function. They are often used in conjunction with other treatments, such as splinting and ergonomic adjustments, to provide comprehensive relief from carpal tunnel syndrome symptoms.
Relieving Nerve Compression
Median nerve compression, occurring along its pathway from the shoulder to the hand, can manifest as pain, tingling, and weakness. PDF resources detailing median nerve glides emphasize their role in addressing this compression by restoring optimal nerve movement. These exercises aren’t about stretching the nerve itself, but facilitating its glide through surrounding tissues.
The six positions within a median nerve glide sequence are designed to mobilize the nerve through potential compression points, including areas in the shoulder, forearm, and wrist. By systematically moving the nerve, glides help to reduce adhesions and improve space for the nerve to travel. This is particularly relevant for individuals experiencing symptoms beyond the wrist, suggesting proximal compression.
Numerous guides, often available as PDFs, demonstrate how these glides can be incorporated into a home exercise program. Consistent practice, as recommended by healthcare professionals, can contribute to long-term relief from nerve compression symptoms and improved overall nerve health, promoting a more comfortable and functional lifestyle.
Improving Hand & Finger Function
Optimal hand and finger function relies heavily on a healthy and uncompressed median nerve. PDF guides on median nerve glides highlight how these exercises directly address functional limitations caused by nerve involvement. By improving nerve gliding mechanics, individuals can experience enhanced dexterity, grip strength, and coordination.
The systematic movements within the glide sequence – transitioning through six distinct positions – work to restore smooth nerve movement, which is crucial for precise motor control. This is particularly beneficial for tasks requiring fine motor skills, such as writing, typing, or manipulating small objects. Improved nerve function translates to reduced clumsiness and increased efficiency in daily activities.
Resources, often available as downloadable PDFs from hand surgery specialists, emphasize the importance of performing these glides correctly. Consistent practice, guided by professional instruction or detailed visual aids, can lead to noticeable improvements in hand and finger function, ultimately enhancing quality of life and participation in desired activities.
Contraindications & Precautions
Before initiating median nerve gliding exercises, particularly those detailed in PDF resources, understanding contraindications is paramount. Individuals experiencing acute inflammation, recent trauma to the hand or wrist, or an open wound in the treatment area should avoid these exercises. Performing glides under such conditions could exacerbate the injury and impede healing.

Furthermore, those with severe nerve compression, diagnosed conditions beyond mild carpal tunnel syndrome, or significant pain should consult a healthcare professional before starting. PDF guides often emphasize that these exercises are not a substitute for medical intervention. Caution is advised if you experience increased pain, numbness, or tingling during the exercises; stop immediately and seek guidance.
Proper form is crucial. Incorrect execution can potentially worsen nerve irritation. Always prioritize gentle, controlled movements, avoiding forceful stretching or straining. Reviewing instructional PDFs and, ideally, receiving guidance from a qualified therapist ensures safe and effective implementation of these techniques.
The 6 Positions of Median Nerve Gliding
Median nerve gliding involves a sequence of six distinct positions, meticulously outlined in many PDF guides for optimal nerve excursion. Position 1 begins with the wrist neutral and fingers/thumb flexed into a fist, thumb facing the body. Position 2 extends the wrist while maintaining a flexed fist.
Position 3 transitions to wrist flexion with fingers and thumb extended. Position 4 involves wrist extension coupled with extended fingers and thumb. Position 5 returns the wrist to neutral, but keeps fingers and thumb extended. Finally, Position 6 is a return to the starting point – neutral wrist and flexed fingers/thumb.
These positions systematically mobilize the median nerve along its pathway. PDF resources often emphasize smooth transitions between each position, holding briefly at each stage. Consistent, controlled movement through this sequence is key to effectively addressing nerve compression and improving overall hand function. Remember to consult a PDF or professional for visual guidance.

Position 1: Neutral Wrist & Flexed Fingers/Thumb
Initiating the median nerve glide sequence, Position 1 establishes a foundational posture detailed in numerous PDF guides. Begin with your wrist comfortably positioned in a neutral alignment – neither flexed nor extended. Simultaneously, gently flex your fingers and thumb, creating a relaxed fist. Crucially, ensure your thumb is facing towards your body, not outward.
This initial position serves to gently load the median nerve, preparing it for the subsequent gliding movements. Many PDF resources emphasize maintaining a relaxed grip, avoiding excessive tension in the hand or forearm. Focus on a natural, comfortable curve in the fingers and thumb.
Hold this position briefly, as instructed in your chosen PDF resource, typically for a few seconds. This allows the nerve to settle into a preparatory stretch before progressing to the next stage of the glide. Proper form in Position 1 is vital for maximizing the effectiveness of the entire exercise series.
Position 2: Wrist Extension with Flexed Fingers/Thumb
Transitioning from Position 1, Position 2 introduces wrist extension while maintaining the flexed position of the fingers and thumb, as commonly illustrated in median nerve glide PDF guides. Gently bend your wrist upwards, so the back of your hand rises, keeping your palm facing downwards. Continue to keep your fingers bent into a relaxed fist, with the thumb comfortably flexed and facing your body.
This movement begins to mobilize the median nerve as it passes through the wrist. PDF resources often highlight the importance of a smooth, controlled motion, avoiding any jerky or forceful movements. The focus should be on a gentle stretch, not on pushing the wrist to its maximum range of motion.
Hold this extended position for the duration specified in your chosen PDF – typically a few seconds. Pay attention to any sensations, and discontinue if you experience sharp pain. This position prepares the nerve for further gliding in subsequent stages, promoting improved mobility and reducing potential compression.
Position 3: Wrist Flexion with Extended Fingers/Thumb
Following Position 2, we move to Position 3, characterized by wrist flexion combined with extended fingers and thumb – a key step detailed in many median nerve glide PDF guides. Slowly bend your wrist downwards, bringing your palm towards the floor. Simultaneously, straighten your fingers and thumb, extending them fully without locking the joints.
This position aims to gently stretch the median nerve as it travels through the carpal tunnel. PDF resources emphasize maintaining a relaxed hand and avoiding any strain. The goal isn’t to force extension, but to achieve a comfortable stretch that promotes nerve gliding. Focus on a controlled movement, feeling the stretch along the forearm and into the hand.
Hold this flexed and extended position for the recommended duration, usually a few seconds, as outlined in your chosen PDF. Be mindful of any discomfort, and stop if you experience sharp pain. This stage prepares the nerve for the next phase, continuing the process of restoring optimal nerve mobility.
Position 4: Wrist Extension with Extended Fingers/Thumb
Transitioning from Position 3, we now enter Position 4: wrist extension while maintaining extended fingers and thumb – a crucial element often illustrated in median nerve glide PDF guides. Gently bend your wrist upwards, pointing your hand towards the ceiling. Keep your fingers and thumb straight and extended, mirroring the previous position, but with the opposite wrist movement.
This phase focuses on stretching the median nerve in a different direction, further encouraging its smooth gliding motion. PDF resources consistently advise against forcing the extension; prioritize a comfortable stretch over achieving a maximal range of motion. A slight stretch should be felt along the top of the forearm and into the hand.
Hold this extended position for the prescribed time, typically a few seconds, as detailed in your selected PDF. Pay attention to your body and cease if any sharp pain arises. This position complements Position 3, ensuring comprehensive nerve mobilization and preparing for the subsequent stages of the glide.
Position 5: Wrist Neutral with Extended Fingers/Thumb
Following Position 4, we move to Position 5: a neutral wrist position while maintaining fully extended fingers and thumb – a key step frequently detailed in median nerve glide PDF instructions. Gently return your wrist to a neutral alignment, meaning it’s neither flexed nor extended. Crucially, continue to keep your fingers and thumb straight and extended throughout this transition.
This position aims to maintain the stretch on the median nerve while reducing stress on the wrist joint. Many PDF guides emphasize the importance of controlled movements, avoiding any jerky or sudden adjustments. Focus on feeling a gentle elongation along the forearm and hand, rather than intense discomfort.
Hold this neutral, extended position for the recommended duration, typically outlined in your chosen PDF resource. This phase prepares the nerve for the final return to the starting position, completing one full cycle of the median nerve glide exercise. Remember to breathe deeply and maintain a relaxed posture.

Position 6: Return to Starting Position (Neutral Wrist & Flexed Fingers/Thumb)
Concluding the sequence, Position 6 involves a smooth return to the initial starting point – a neutral wrist coupled with flexed fingers and a gently curled thumb. This final phase, often illustrated in median nerve glide PDF guides, requires controlled movement to avoid re-aggravating any nerve compression. Slowly bend your wrist back to the neutral position, simultaneously curling your fingers into a relaxed fist, ensuring your thumb faces your body.
Many resources highlight the importance of maintaining a gentle stretch throughout this return, rather than abruptly dropping into the starting position. This controlled descent helps to ‘unload’ the nerve gradually. Focus on coordinating the wrist and finger movements for optimal effectiveness.
Hold the starting position briefly, then repeat the entire sequence. PDF instructions typically recommend several repetitions, performed multiple times daily. Remember to listen to your body and stop if you experience any sharp pain.
Performing the Median Nerve Glide Exercise
Executing the median nerve glide exercise demands a deliberate and controlled approach, often detailed in comprehensive PDF guides. Begin by familiarizing yourself with all six positions before initiating the movement. Start slowly, focusing on proper form over speed. Transition smoothly between each position, avoiding any jerky or abrupt motions that could irritate the median nerve.
As you move through the sequence, maintain a gentle tension – you should feel a stretch, but not pain. Many PDF resources emphasize the importance of coordinating your breathing with the movements; inhale during less strenuous positions and exhale during those requiring more effort.

Visualize the median nerve gliding through its pathway as you perform the exercise. This mental focus can enhance its effectiveness. Remember to consult a PDF or healthcare professional for personalized guidance and modifications if needed.
Frequency & Repetitions
Determining the optimal frequency and repetitions for median nerve glides is crucial for achieving positive outcomes, and detailed guidance is often available in specialized PDF resources. A common recommendation, found in many home exercise programs, suggests performing the exercise multiple times daily – typically 2-3 times – to promote consistent nerve mobility.
Regarding repetitions, starting with a modest number, such as 5-10 repetitions per session, is advisable. Gradually increase the number of repetitions as your comfort level improves, but always prioritize quality over quantity. PDF guides often advise holding each position for a specific count, generally around 5-10 seconds, to maximize the stretch.
Listen to your body and adjust the frequency and repetitions accordingly. If you experience any pain or discomfort, reduce the intensity or consult a healthcare professional. Consistency is key, but avoid overdoing it.
Finding Reliable PDF Resources
Locating trustworthy PDF resources detailing median nerve glides is essential for safe and effective practice. Many hand surgery clinics and physical therapy practices offer downloadable guides for patients. Searching online using specific keywords like “median nerve gliding exercises PDF,” “carpal tunnel exercises PDF,” or “hand therapy PDF” can yield valuable results.
Prioritize resources from reputable medical institutions, hospitals, or qualified healthcare professionals. Look for PDFs that clearly illustrate each position of the glide, provide detailed instructions, and offer precautions. Websites like those of hand surgery groups (e.g., Raleigh Hand Surgery) often host these materials.
Always critically evaluate the source. Ensure the information is current, evidence-based, and aligns with recommendations from your healthcare provider. Be cautious of resources with unclear authorship or overly simplistic instructions. A comprehensive PDF will also address contraindications and potential troubleshooting tips.
Potential Benefits & Expected Outcomes
Consistent performance of median nerve glides, as outlined in many downloadable PDF guides, can yield several positive outcomes. Primarily, these exercises aim to improve nerve mobility, reducing compression and alleviating symptoms associated with conditions like carpal tunnel syndrome. Expect a gradual decrease in pain, tingling, and numbness in the hand and fingers.
Furthermore, improved nerve gliding can enhance hand and finger function, increasing dexterity and grip strength. Individuals may notice an easier time performing daily tasks requiring fine motor skills. However, it’s crucial to understand that results aren’t immediate; consistent practice over weeks or months is typically needed.
Realistic expectations are key. While these glides can be highly beneficial, they may not completely eliminate symptoms in all cases. Combining these exercises with other therapies, as recommended by a healthcare professional, often maximizes positive outcomes. PDF resources often emphasize the importance of a holistic approach.
Troubleshooting & When to Seek Professional Help
If you experience increased pain, numbness, or tingling during median nerve glides, immediately stop the exercise. This indicates potential aggravation of the nerve and necessitates professional evaluation. Don’t push through discomfort; listen to your body. Review PDF guides carefully to ensure correct form, as improper technique can exacerbate symptoms.
Additionally, if you don’t notice any improvement after several weeks of consistent, correct performance – following the frequency and repetitions outlined in reliable resources – it’s time to consult a healthcare professional. Self-treatment has limitations. A doctor can accurately diagnose the underlying cause of your symptoms and recommend a more tailored treatment plan.
Seek professional help promptly if you suspect a more serious condition, such as severe nerve compression or a different underlying pathology. PDF resources are informative, but they cannot replace the expertise of a qualified medical practitioner. Don’t delay seeking help if symptoms worsen or interfere with daily life.