
Daikin FTXS09LVJU Manual: A Comprehensive Guide
This manual provides detailed instructions for the FTXS09LVJU, FTXS12LVJU, and CTXS07LVJU models, covering installation, operation, and maintenance with R410A refrigerant.
The Daikin FTXS09LVJU is a highly efficient and reliable split system air conditioner designed for optimal comfort and energy savings. This manual serves as a comprehensive resource for users and installers alike, detailing everything from initial setup to ongoing maintenance. It specifically addresses models including the FTXS09LVJU, FTXS12LVJU, and CTXS07LVJU, ensuring broad applicability.
Understanding the intricacies of this system is crucial for maximizing its performance and lifespan. This guide emphasizes safety precautions throughout the installation process, particularly when handling R410A refrigerant. Proper installation, as outlined within, guarantees efficient operation and minimizes potential issues. Furthermore, it provides essential information regarding electrical wiring and refrigerant piping, vital components for a successful setup. This manual aims to empower users with the knowledge needed for a seamless experience.
Key Features and Specifications
The Daikin FTXS09LVJU series boasts several key features, including high energy efficiency and quiet operation, making it ideal for residential and small commercial spaces. These split systems utilize R410A refrigerant, a modern standard offering improved environmental performance compared to older refrigerants; The models – FTXS09LVJU, FTXS12LVJU, and CTXS07LVJU – cater to varying cooling and heating demands.
Specific specifications, detailed in the full manual, encompass cooling capacity, heating capacity, power consumption, and dimensions. Installation requires careful attention to refrigerant piping, ensuring accurate measurements between liquid and gas lines. The manual recommends stranded cable for interunit wiring, prioritizing a secure and reliable electrical connection. These units are designed for ease of maintenance, with readily accessible air filters and coils for cleaning, contributing to long-term performance and efficiency.

Installation Guide

Proper installation is crucial for optimal performance; this section details safety precautions, required tools, and specific procedures for refrigerant piping and electrical wiring.
Safety Precautions During Installation
Prior to commencing installation, carefully review all safety precautions to ensure a secure and correct setup of your Daikin air conditioning system. Always disconnect the power supply before undertaking any electrical work to prevent electric shock. Refrigerant handling requires specialized knowledge; ensure compliance with all relevant regulations and safety guidelines when working with R410A refrigerant.
Properly ground the air conditioner to avoid electrical hazards. When lifting the indoor or outdoor units, utilize appropriate lifting equipment and follow safe lifting practices to prevent injury or damage. Always measure the actual distance between refrigerant pipe ends before installation, and exercise caution when bending or curving these pipes. Incorrect installation can lead to refrigerant leaks, system malfunction, or even pose a safety risk. Adhere strictly to the manufacturer’s instructions and local codes.

Tools Required for Installation
Successful installation of the Daikin FTXS09LVJU series necessitates a specific set of tools to ensure precision and safety. Essential tools include a flaring tool kit for accurate refrigerant pipe connections, a pipe cutter designed for copper tubing, and a torque wrench to tighten fittings to the manufacturer’s specified levels.
Electrical work demands wire strippers, a multimeter for testing connections, and appropriate screwdrivers. For mounting, you’ll need a drill with various bit sizes, a level to ensure proper unit alignment, and measuring tape for accurate placement. Furthermore, a vacuum pump is crucial for evacuating the refrigerant lines, and a leak detector is vital for verifying system integrity. It is recommended to use stranded cable for interunit wiring, alongside appropriate crimping tools for secure connections. Safety glasses and gloves are also essential personal protective equipment.
Refrigerant Piping – Important Considerations
When installing refrigerant pipes for the Daikin FTXS09LVJU, precise measurements are paramount. Always measure the actual distance between the liquid and gas pipe ends before installation to avoid errors. Bending or curving refrigerant pipes requires careful attention; avoid sharp angles that could restrict refrigerant flow or damage the tubing.
Proper pipe sizing is critical to maintain system efficiency and prevent issues. Ensure the chosen pipe diameter aligns with the unit’s specifications and the length of the piping run. Use only approved refrigerant-grade copper tubing, and thoroughly deburr all cut ends. Pay close attention to flaring, ensuring a secure and leak-proof connection. Nitrogen purging is recommended during brazing to prevent oxidation inside the pipes, maintaining system purity and longevity.
Electrical Wiring – Interunit Cable Recommendations
For reliable communication between the indoor and outdoor units of the Daikin FTXS09LVJU, selecting the correct interunit cable is crucial. The installation manual recommends stranded cable for interunit wiring, offering greater flexibility and resistance to vibration compared to solid core wire. Ensure the cable gauge is appropriate for the distance between units, adhering to local electrical codes and regulations.
Proper cable routing is essential to prevent damage and ensure signal integrity. Avoid sharp bends, pinching, or exposure to extreme temperatures. Secure the cable adequately to prevent strain on the connections. Double-check all wiring connections, verifying polarity and tightness. Incorrect wiring can lead to system malfunction or even damage to the components. Always disconnect power before performing any electrical work.
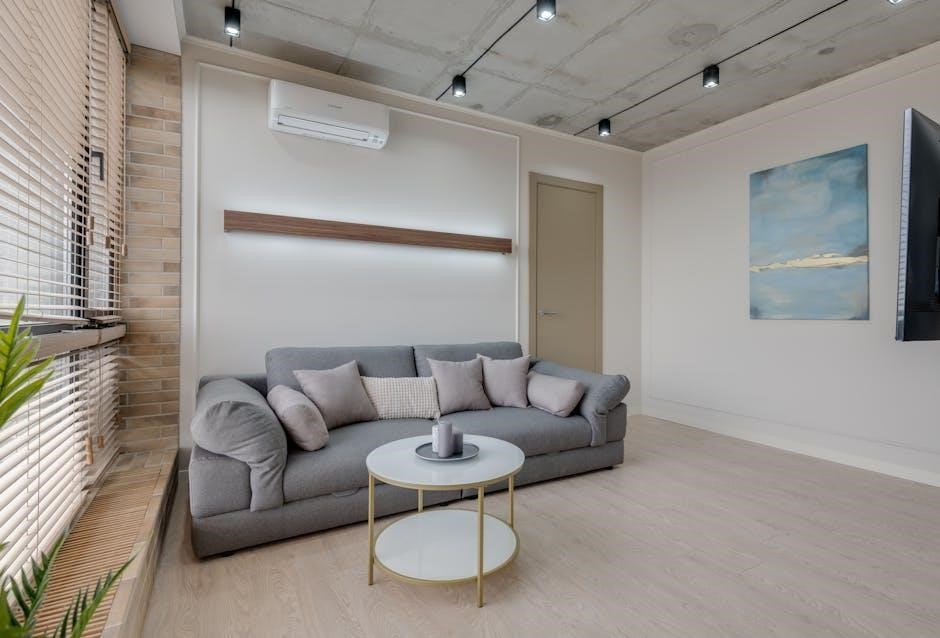
Indoor Unit Mounting Instructions
Securely mounting the indoor unit is vital for optimal performance and safety. Begin by selecting a suitable location, ensuring sufficient space for airflow and maintenance access. The mounting bracket must be firmly attached to a structurally sound wall, capable of supporting the unit’s weight. Use appropriate screws and anchors for the wall type.
Carefully align the indoor unit with the mounting bracket, ensuring it is level. Confirm that all refrigerant and drain lines are routed correctly before fully securing the unit. Avoid mounting the unit in direct sunlight or near heat sources, as this can affect cooling efficiency. Double-check all connections and ensure the unit is stable before restoring power. Proper installation minimizes noise and vibration.
Outdoor Unit Placement and Installation
Proper outdoor unit placement is crucial for efficient operation and longevity. Select a location that provides ample airflow, free from obstructions like shrubs or walls. Ensure the unit is installed on a level, stable surface – a concrete pad is recommended – to minimize vibration and noise. Avoid direct sunlight exposure, especially during peak hours, as it can reduce cooling capacity.
Maintain sufficient clearance around the unit for servicing, as specified in the installation manual. Securely connect refrigerant lines and electrical wiring, following all safety precautions. Protect the unit from harsh weather conditions, considering a weather shield if necessary. Proper installation prevents premature failure and ensures optimal performance of your Daikin system.

Operation and Usage
Effectively utilize cooling, heating, and auto modes with the remote control, adjusting fan speeds and airflow for personalized comfort and efficient operation.
Understanding the Remote Control
The Daikin remote control is your primary interface for operating the FTXS09LVJU air conditioner. Familiarize yourself with its layout for optimal use. Key buttons include the power button for on/off functionality, mode selection (cooling, heating, auto, dry, and fan only), and temperature adjustment controls.
The fan speed button allows you to choose from various settings – auto, low, medium, high – to customize airflow. The airflow direction buttons control the louvers, directing air horizontally or vertically. Utilize the timer buttons to set schedules for automatic operation, enhancing convenience and energy savings.
The ‘Display’ button controls the information shown on the indoor unit. Explore the advanced features like ‘Economy’ mode and ‘Good Night’ mode for further customization. Proper understanding of these controls ensures efficient and comfortable climate control.

Operating Modes – Cooling, Heating, Auto
The Daikin FTXS09LVJU offers versatile operating modes to suit your needs. In Cooling mode, the unit actively lowers the room temperature, removing heat and humidity. Heating mode provides warmth during colder months, utilizing the heat pump technology. The Auto mode intelligently switches between cooling and heating to maintain a set temperature, optimizing comfort and energy efficiency.
When selecting a mode, the remote control displays the corresponding indicator. Cooling mode is indicated by a snowflake icon, while heating is shown with a flame. Auto mode operates based on the difference between the set temperature and the room temperature.
Ensure proper ventilation when using heating mode. The unit efficiently delivers desired temperatures in each mode, providing a comfortable indoor environment throughout the year.
Fan Speed and Airflow Direction Control
The Daikin FTXS09LVJU allows precise control over airflow. You can select from multiple fan speeds – Auto, Low, Medium, High – using the remote control. Auto mode adjusts fan speed based on the temperature difference. Manual settings provide customized airflow intensity.
Airflow direction is also adjustable via the remote. Vertical vanes can be positioned to direct air upwards, downwards, or horizontally. Horizontal vanes control left-to-right airflow. This allows for personalized distribution, avoiding direct drafts and ensuring even cooling or heating throughout the room.
Utilize the swing function for automatic vane movement, distributing air more widely. Proper airflow direction optimizes comfort and energy efficiency, creating a pleasant indoor climate.
Timer Settings and Scheduling
The Daikin FTXS09LVJU offers versatile timer functionalities for convenient operation. A real-time clock allows precise scheduling. You can set a “On” timer to automatically start the unit at a specified time, pre-cooling or pre-heating your space.
Conversely, an “Off” timer enables automatic shutdown after a set duration or at a designated time, conserving energy. Daily scheduling allows you to program different settings for each day of the week, tailoring operation to your routine.
Combine timers for complex schedules. For example, set an “On” timer for before you wake up and an “Off” timer for when you leave for work. These features enhance comfort and promote energy savings.

Maintenance and Troubleshooting
Regular cleaning of air filters and coils is crucial for optimal performance. Addressing error codes promptly and detecting refrigerant leaks ensures longevity and efficiency.
Air Filter Cleaning Procedures
Maintaining clean air filters is essential for efficient operation and air quality. The Daikin FTXS09LVJU utilizes easily accessible filters designed for simple removal and cleaning. Begin by switching off the unit and disconnecting the power supply for safety. Locate the filter access panel on the indoor unit – typically at the front. Gently slide or unclip the panel to reveal the filters.
Carefully remove the filters, noting their orientation for correct re-installation. Vacuum the filters to remove loose dust and debris. For a more thorough cleaning, wash the filters with mild detergent and lukewarm water, avoiding harsh chemicals. Rinse thoroughly and allow the filters to completely dry before re-installing. A damp filter can promote mold growth. Re-insert the filters in their original orientation, secure the access panel, and restore power. Regular cleaning – ideally every two weeks – will optimize performance and extend the unit’s lifespan.
Coil Cleaning – Indoor and Outdoor Units
Regular coil cleaning is crucial for maintaining optimal cooling and heating efficiency. Begin by disconnecting power to both the indoor and outdoor units for safety. The indoor unit’s evaporator coil can be accessed after removing the front panel and filters. Use a soft brush or vacuum with a brush attachment to gently remove dust and debris. Avoid bending the delicate fins.
For the outdoor unit’s condenser coil, remove any surrounding debris like leaves or grass. A garden hose with a gentle spray nozzle can be used to rinse the coil from the inside out, being careful not to damage the fins. Specialized coil cleaner solutions are available for stubborn dirt, but follow the product instructions carefully. Ensure both coils are completely dry before reassembling the units and restoring power. Professional cleaning is recommended annually for thorough maintenance and longevity.
Troubleshooting Common Issues – Error Codes
The Daikin FTXS09LVJU utilizes error codes to indicate system malfunctions. If an error code appears on the remote display, consult the manual for a specific diagnosis. Common issues include refrigerant leaks (indicated by specific codes), sensor failures, or communication errors between the indoor and outdoor units;

Before attempting any repairs, disconnect power to the unit. Some errors, like filter reminders, can be resolved with simple maintenance. However, more complex errors often require a qualified technician. Do not attempt to repair refrigerant circuits yourself, as this requires specialized tools and knowledge. Record the error code before contacting service for faster assistance. Ignoring error codes can lead to further damage and reduced system performance. Always prioritize safety and professional help when dealing with complex issues.
Refrigerant Leak Detection
Detecting refrigerant leaks in the Daikin FTXS09LVJU is crucial for optimal performance and environmental responsibility. R410A refrigerant requires careful handling. Signs of a leak include reduced cooling capacity, ice formation on the refrigerant lines, or the presence of an oily residue near connections.
Professional leak detection equipment is recommended, such as electronic leak detectors or bubble solutions specifically designed for refrigerant. Never use open flames to search for leaks. If a leak is suspected, immediately ventilate the area and contact a qualified HVAC technician. Do not attempt to repair the leak yourself, as R410A is a high-pressure refrigerant. Proper repair requires specialized tools and adherence to safety regulations. Addressing leaks promptly prevents further refrigerant loss and potential system damage.

Technical Details
This section details the FTXS09LVJU model’s specifications and focuses on R410A refrigerant—its safe handling, properties, and crucial safety considerations for technicians.
R410A Refrigerant – Handling and Safety
R410A is the refrigerant used in the Daikin FTXS09LVJU series, requiring specific handling procedures due to its high pressure. Technicians must be certified to handle this refrigerant, adhering to EPA regulations. Always recover R410A into approved recovery cylinders, preventing its release into the atmosphere.
Proper ventilation is crucial when working with R410A, and safety glasses are mandatory to protect your eyes. Avoid breathing refrigerant vapors, and in case of contact with skin or eyes, flush immediately with water and seek medical attention.
When charging or recovering, ensure connections are tight to prevent leaks. Never mix R410A with other refrigerants. Dispose of used refrigerant and containers according to local regulations. Incorrect handling can lead to system malfunction and environmental damage, so prioritize safety.
Detailed Specifications – FTXS09LVJU Model
The Daikin FTXS09LVJU is a split system air conditioner designed for efficient cooling and heating. Its cooling capacity is 9,000 BTU/h (2.6 kW), suitable for rooms up to 250 sq. ft. It operates on a single-phase power supply, with a rated voltage of 220-240V/50Hz.
The indoor unit dimensions are compact, facilitating easy installation. It features a refrigerant charge of approximately 550g of R410A. Sound levels are remarkably low, reaching only 26 dB(A) on the lowest fan speed.
The unit boasts a SEER (Seasonal Energy Efficiency Ratio) of 16.0 and a HSPF (Heating Seasonal Performance Factor) of 9.0, indicating high energy efficiency. Dehumidification capacity is 1.8 liters per hour. Detailed electrical specifications, including maximum current draw, are available in the full installation manual.